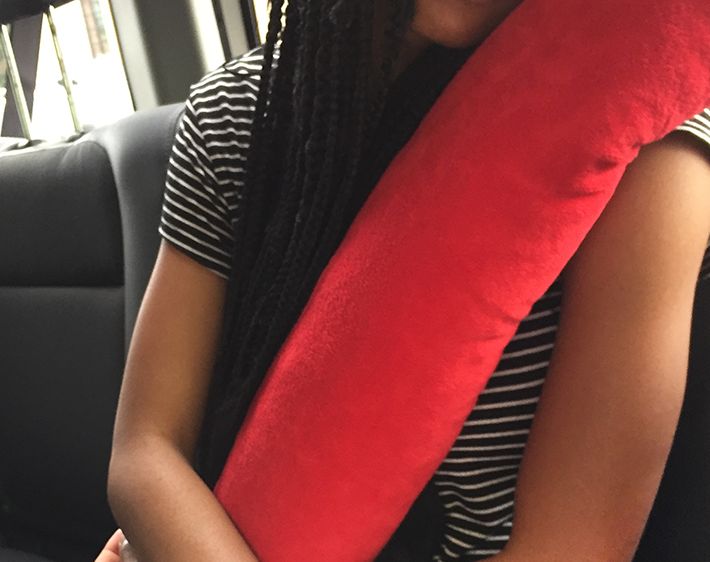
Road trips are filled with adventure, long talks and lots and lots of driving. And while we’re big fans of being in and around cars, over long lengths of time, passengers often get tired and uncomfortable. While quality tires and a smooth ride can help ease the journey, we’ve learned a few hacks over the years for getting comfy in the car. Lean on this cozy DIY cushion we’ve created and help your passengers combat the long-ride neck kinks.
Materials:
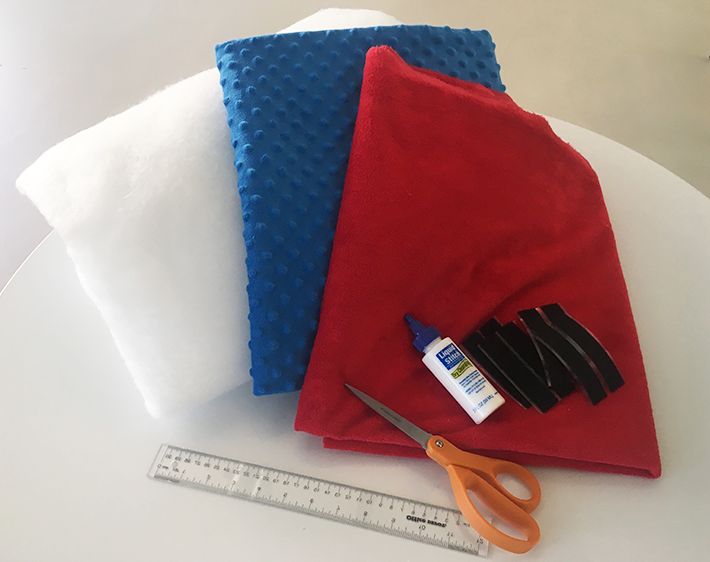
- Velcro Strip
- Fabric Glue
- Fleece Fabric – 2 pieces of 12” x 26”
- Batting or Pillow Stuffing
- Scissors
- Ruler
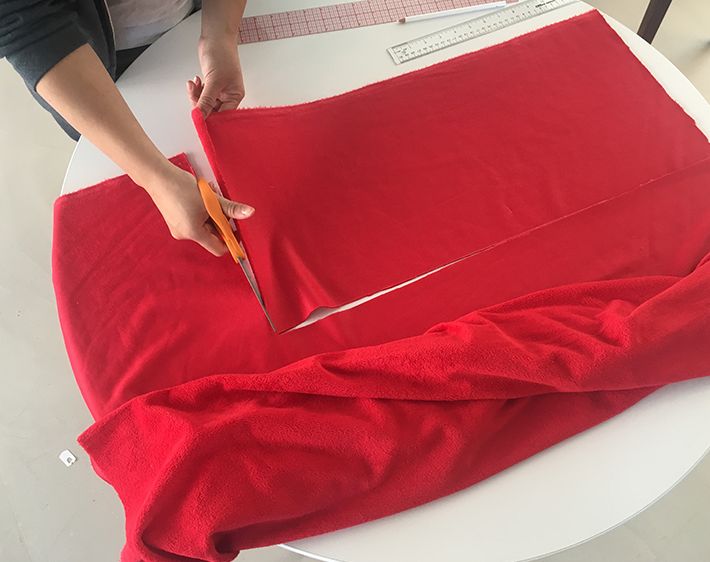
Step 1:
Using a ruler and scissors, measure and cut two pieces of 12” by 26” out of fleece or soft fabric.
Step 2:
Decide which side of the fabric you want to face outward on your final pillow. For example, if one side of your fabric is patterned or softer, that’s the side you want facing outward. Let’s call it the fun side. With the fun sides facing each other, glue the edges of both long sides and one of the short side together with fabric glue. This will leave one of the short edges as an opening.
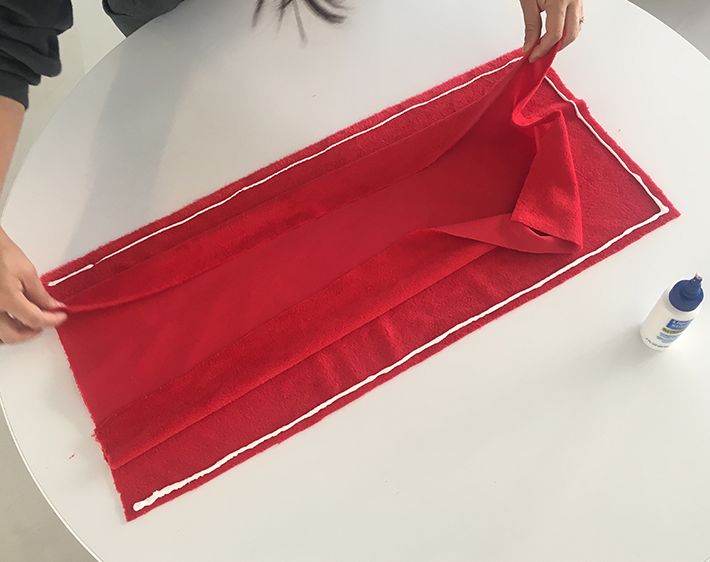
Step 3:
Let the glue dry completely before flipping the pillow case inside-out so the fun side is now facing outwards.
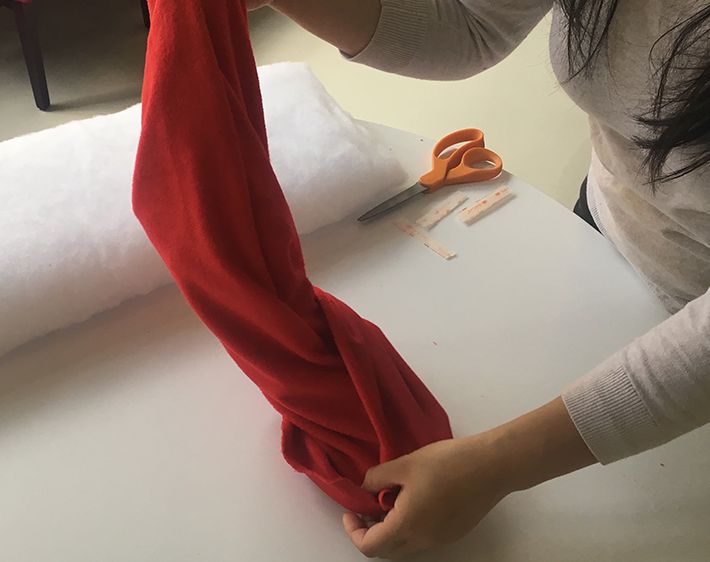
Step 4:
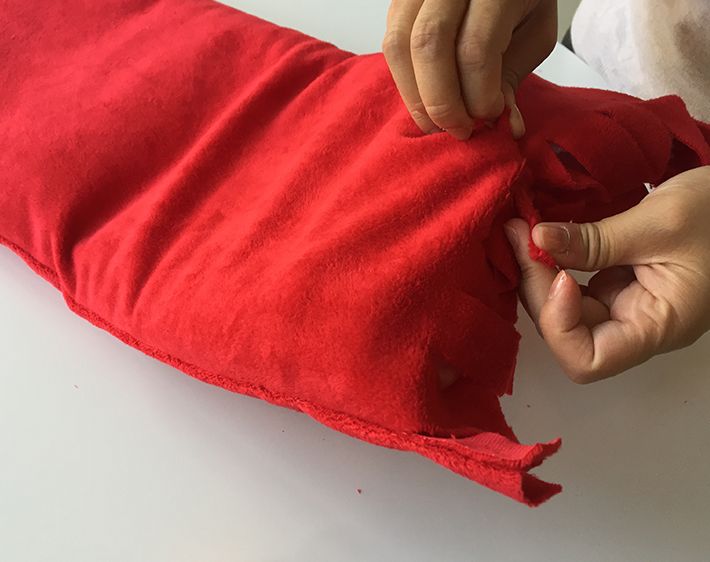
Using your scissors, cut 3-inch long and 1-inch wide slits along the one remaining side that isn’t glued shut.

Step 5:
Using the side that isn’t glued as an opening, stuff the pillow case with batting or pillow stuffing.
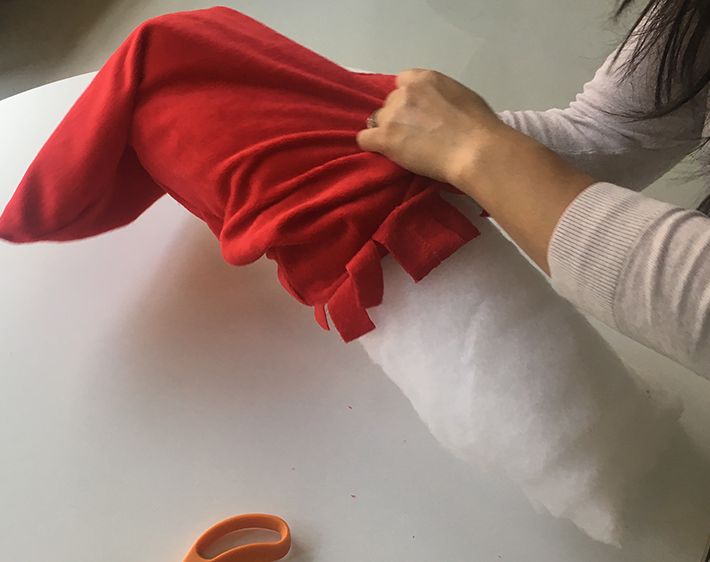
Step 6:
Once your stuffing is inside, match each slit with its corresponding slit below. Double knot and tie each pair of slits together across the edge until the stuffing materials are secured inside.
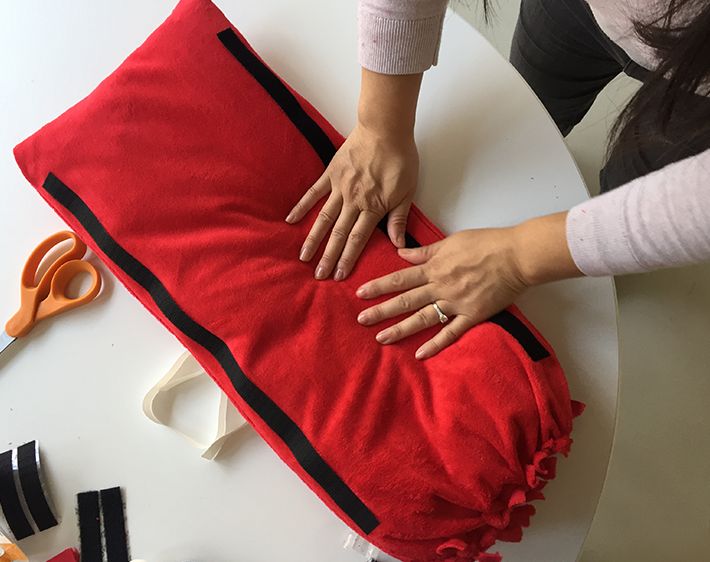
Step 7:
Take your two corresponding pieces of velcro strip and attach them along the long edge of one side of the pillow, about 10 inches apart.
Step 8:
Wrap your pillow around the seat belt and fasten together with the velcro strips. Now all you have to do is sit back, and get cozy (when you’re not in the driver’s seat).
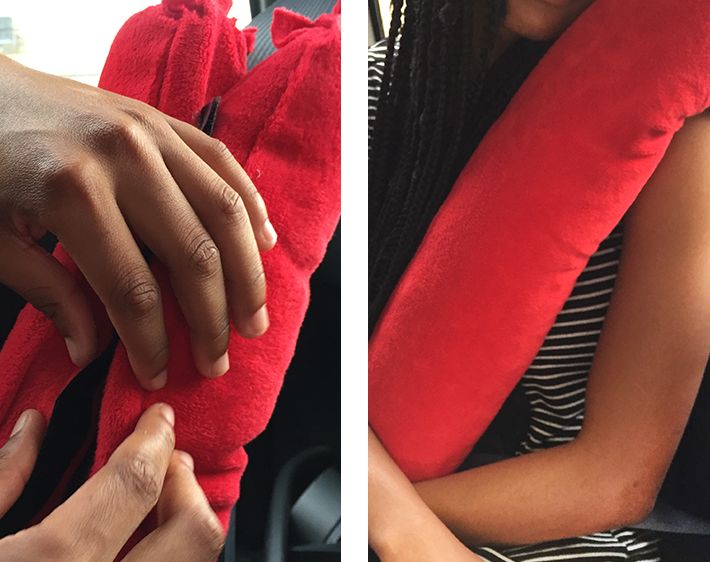
It doesn’t take an expert tech to assemble this neat little hack. Simply attach or detach your DIY seatbelt pillow to any seat in the car, and let your passengers snuggle up and drift off. Just be sure to check your manual before attaching these to car seats or boosters, to make sure you don’t void any warranties.
Get prepared for a long journey across the state or the country by visiting your nearest Firestone Complete Auto Care location. Or check out the latest tire and auto service coupons.